|
|
Review: Antec Performance One - P280 review |

Computer enthusiasts have been building their own PCs for
almost as long as personal computers have been around. The attraction of building
your own PC is a simple one, in general you can build a more powerful PC when
you are prepared to build it yourself than you could when buying a prebuilt PC
for the same amount of cash.
The other attraction of building your own system is you can
specify your own components for the build, and build the PC to your exact
specification.
All PC builds should start with a good quality PC enclosure,
and in this review I will be taking a look at the Antec Performance One P280.
The P280 is aimed at the professional home/soho user. The Antec P280 is designed
for silent running and good cooling performance, rather than out and out
cooling performance. The question is, has Antec got the balance right? Let's
find out in this review.
Antec company information
Antec should need no introduction, but for those of you who
would like to find out more about Antec, you can do so at their website.
The Antec Performance One - P280 enclosure

Specifications
The Antec P280 is a large case measuring 526mm high, 231mm
wide, and 562mm deep, and is also quite heavy at 10.2kg (unpopulated). The P280
can accommodate motherboards sizes of up to XL-ATX (extra large ATX).
Other features included are as follows.
- 2x 120mm top exhaust fans
- 1x 120mm rear exhaust fan
- 2x USB3 ports on the front panel
- 2x USB2 ports on the front panel
- Audio in and out sockets on the front panel
- 9x expansion slots
- 3x 5.25" tool-less drive bays
- 2x 2.5" drive bays
- 6x 3.5" or 2.5" drive trays with silicon
acoustic dampers - 3cm space behind the motherboard tray for cable management
- Advanced cable management
- 4x 120mm fan housings for optional fans.

Cooling
In the above screenshot we can see the default cooling
solution which consists of three 120mm TwoCool 2 speed fans manufactured by
Antec themselves. These three fans are connected to a fan controller module,
which allows the speed of the fans to be set to two positions which are high
speed and low speed. The speeds are set by selecting either low or high speed
on the three slide switches on the fan module, with the speed of each fan being
selectable individually
With the default cooling solution, the enclosure will be
cooled by negative pressure, which means all fans are exhaust fans, and are
therefore pulling hot air out of the enclosure. The optional 120mm fan mounts,
if used, are positioned at the front and rear of the HDD trays to assist
cooling of any fitted HDDs.
The two top fans are positioned in such a way that will
allow a standard 240mm radiator to be installed for water cooling. This will
allow integrated water coolers such as Corsair H100 to be installed. The 120mm
rear exhaust can also be used for water cooling solutions, such as Antec's own
KUHLER series. In both cases you will first have to remove the pre-installed
120mm fans.
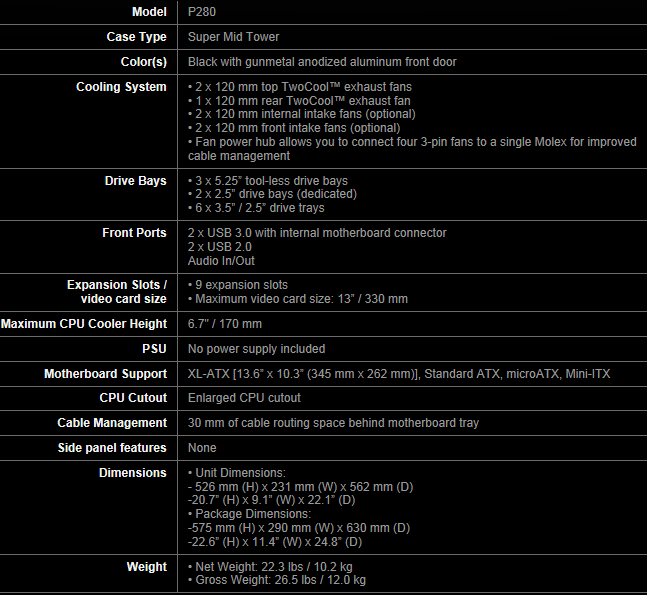
Enclosure rear
On the rear of the case we can see the nine expansion slots,
and also the I/O panel, fan speed selectors, 120mm rear exhaust fan, rubber
grommets to allow external water cooling solutions, and finally at the bottom
of the case, the cut-out for the PSU, which is not supplied.
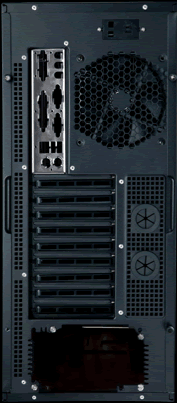
Tool-less 5.25" drive bays
In the above screenshot we can see three 5.25"
tool-less drive bays. These can house optical drives, or perhaps a controller
surface for other peripherals. Fitting an optical drive is very simple, you
just slide the drive in, and it will lock into place. Removing the drive is
just as easy. Just press the lever and the drive will unlock and you can easily
slide the drive out of the bay.
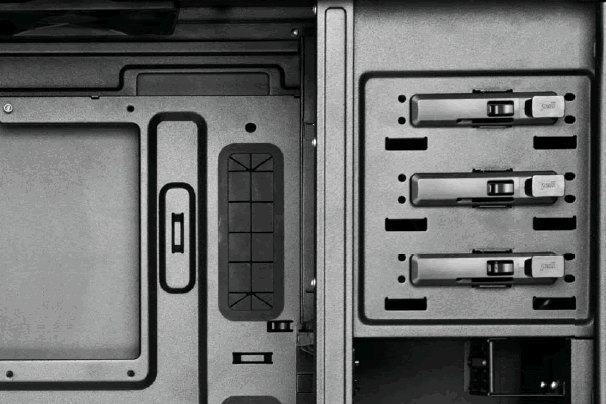
Front door and front panel USB and audio sockets
The door can be opened a full 270 degrees, allowing access
to the 5.25" drive bays, and also easy access to the front intake air
filter. The door itself is a dual layer design, with polycarbonate foam to
reduce noise. At the top we can also see the 2x USB3 sockets, 2x USB2 sockets,
and also the audio in and out sockets. The leads fitted to all these sockets
should be long enough to connect to the appropriate header on the motherboard,
with the USB3 lead having a proper USB3 front panel plug.
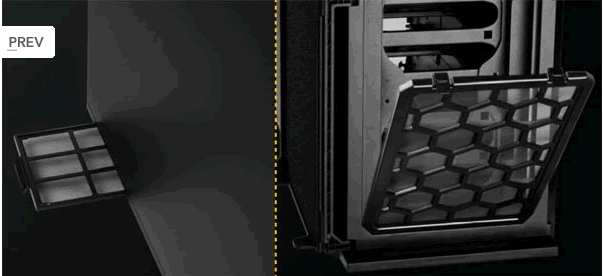
Air intake filters
On the left we can see the PSU air intake filter. The filter
removal is simplicity itself. You simply slide the filter out on its tray,
clean the filter, and then slide it back into position. This can be done
without having to remove the side panel of the enclosure, brilliant.
On the right we can see the front air intake filter. Once
again removing and cleaning this filter couldn't be simpler. You just open the
front door, pull down the filter, clean it, then push it back into place. I
removed and cleaned both filters, and then refitted both in less than 3
minutes.
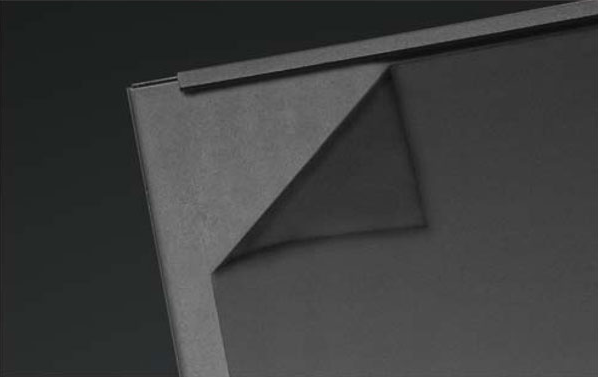
Dual layer side panels
The side panel is made from 0.8mm steel and the second layer
consists of polycarbonate foam to deaden noise and vibration.
Summary
The Performance One P280 looks sleek but understated, and
just oozes quality both inside and out.
Now let's head to the next page, where we look at
installing the motherboard and other components.....


")


